AI in under a minute.
Or by hand, tooth by tooth.
DentalMagic is the aesthetic simulation module of the DentalMaster suite. The AI gives you a base while the patient is still in the chair. The lasso gives you every tooth, every edge, every shade — when the case needs it.
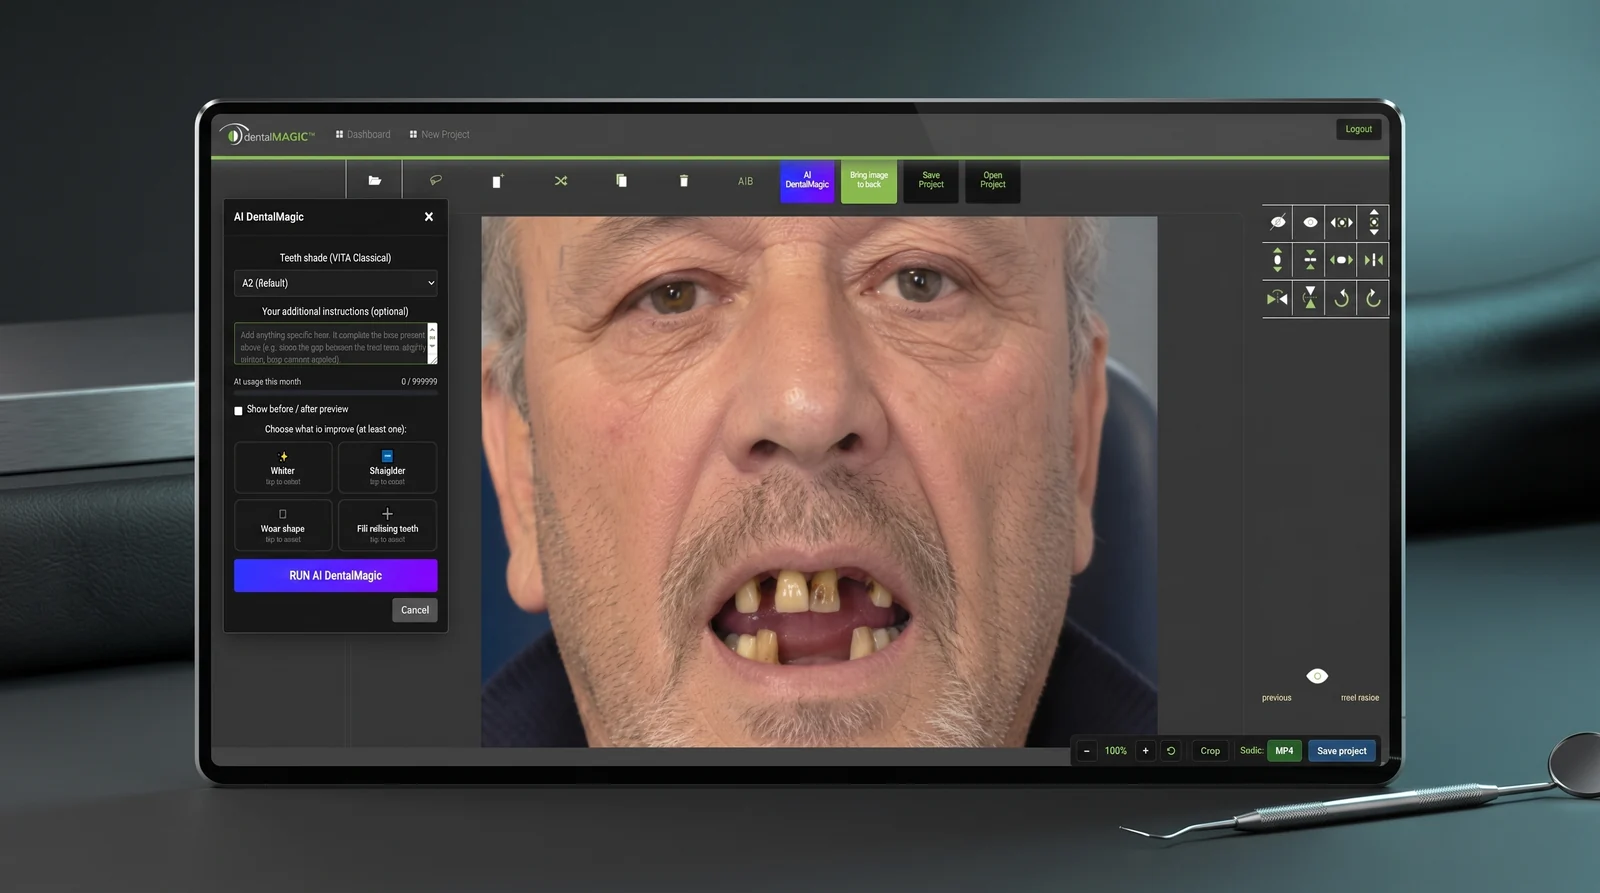
DentalMagic running in the browser on a tablet. No app store, no operating system requirement.
Two routes. Pick the one that matches the time you have.
Same result, two roads into it. They also work together — run the AI to get your base in seconds, then refine one detail by hand.
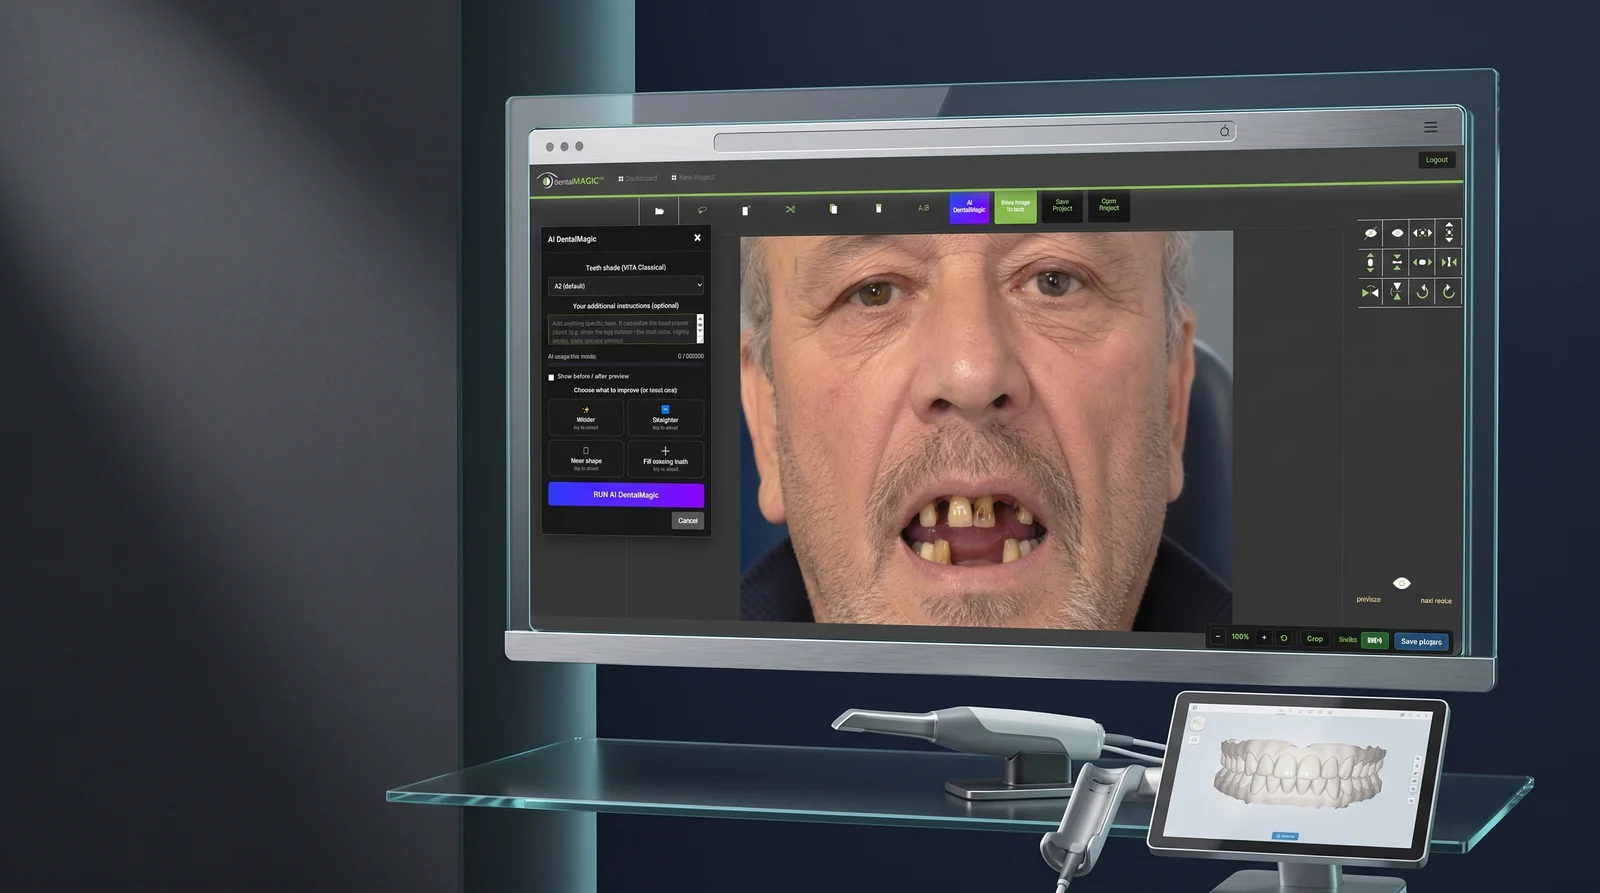
Chairside, on the screen already in the room.
With AI
You import the photo, tick what you want improved, hit run.
- Import the image.
- Set up the AI window — VITA Classical shade (A2 by default), a one-sentence prompt in your own words, and at least one improvement.
- Run AI DentalMagic.
- Compare with the A|B slider, then save.
By hand
You draw the area yourself, create a layer, and place it where you want it.
- Import, then outline with the lasso.
- Create the layer — control points appear.
- Place, resize, rotate with the transform pad.
- Duplicate, compare, save.
Four improvements. Tick one, or several.
The number of options does not lengthen the processing time.
Whitening
Lightens the enamel while keeping its translucency and texture. Tooth shape is untouched.
Alignment
Straightens teeth that overlap or lean, and closes the gaps.
Better symmetry
Harmonises shape and proportion — worn edges, chipped teeth, left / right asymmetry.
Missing teeth
Fills the empty spaces only. You click the position of each absent tooth first; existing teeth are protected and nothing is redrawn over them.
Only the teeth change. Everything else stays the patient.
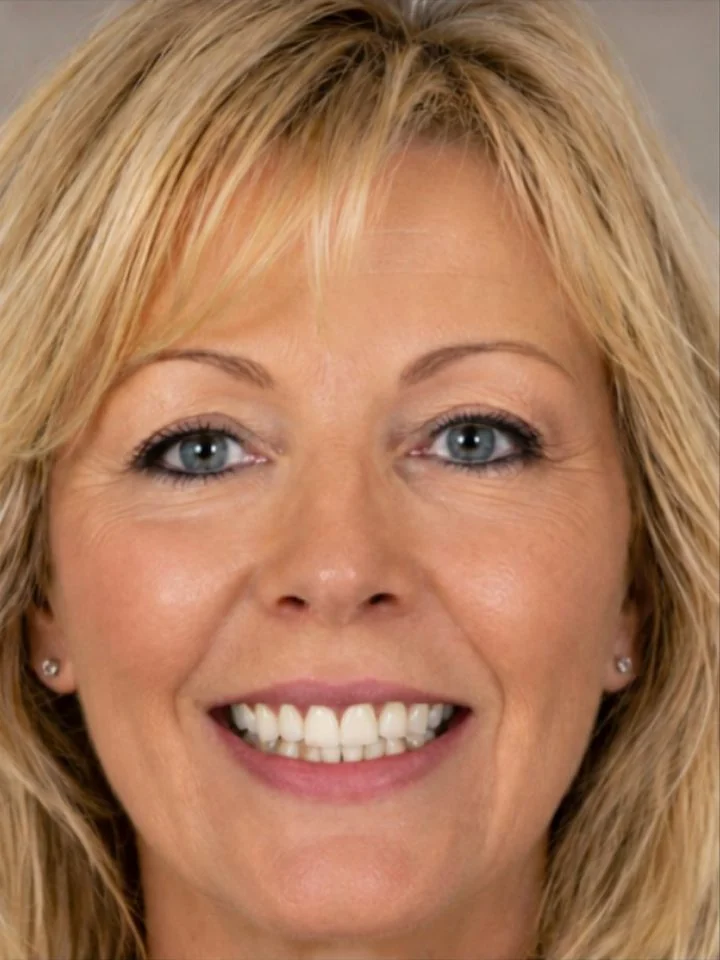
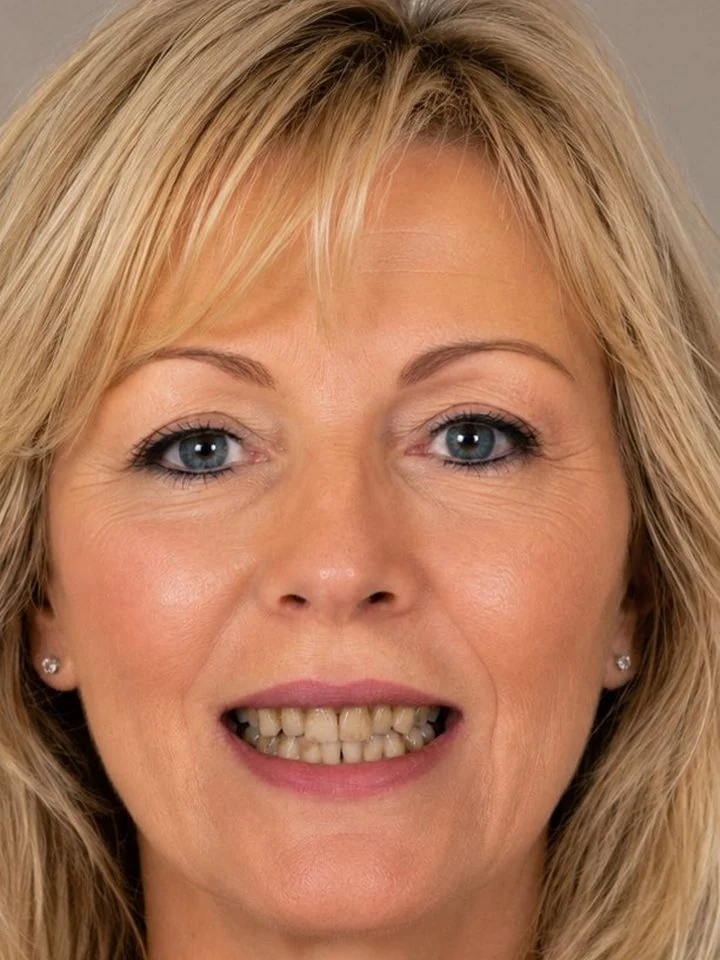
A preview loses the patient the moment they notice that something else moved. Gums, lips, skin texture and expression are preserved faithfully; the simulation acts on the dentition and nowhere else.
What comes back is a plausible clinical result on that person's face — never the uniform white that patients recognise as fake and that no ceramist would ever deliver. That restraint is the whole point: a preview the patient only half believes produces a half decision, and a half decision is the one that gets postponed.
Simulated dental morphology may differ slightly from the final clinical result. Illustration only — does not guarantee the final result.
The tooth you reuse is the patient's own tooth.
You lasso an existing tooth — or a piece of one — and it becomes a movable layer. Same colour, same texture, same translucency, because it came from the same mouth. Then the transform pad handles the rest.
Where an automated simulator trades control for ease, this is where you take it back.
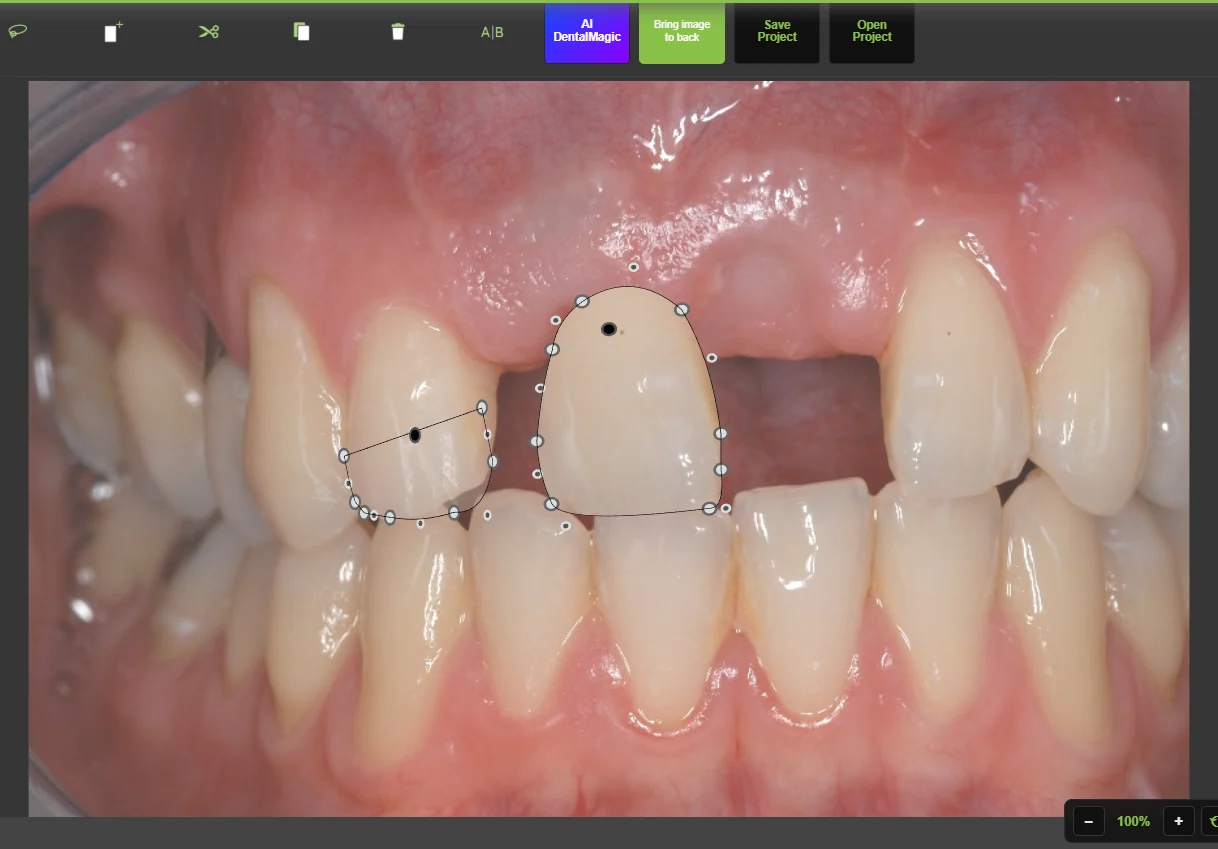
One layer lassoed from the patient's own dentition, duplicated and set down in the empty space. The white points redraw the outline; the black dot fixes where it grows from.
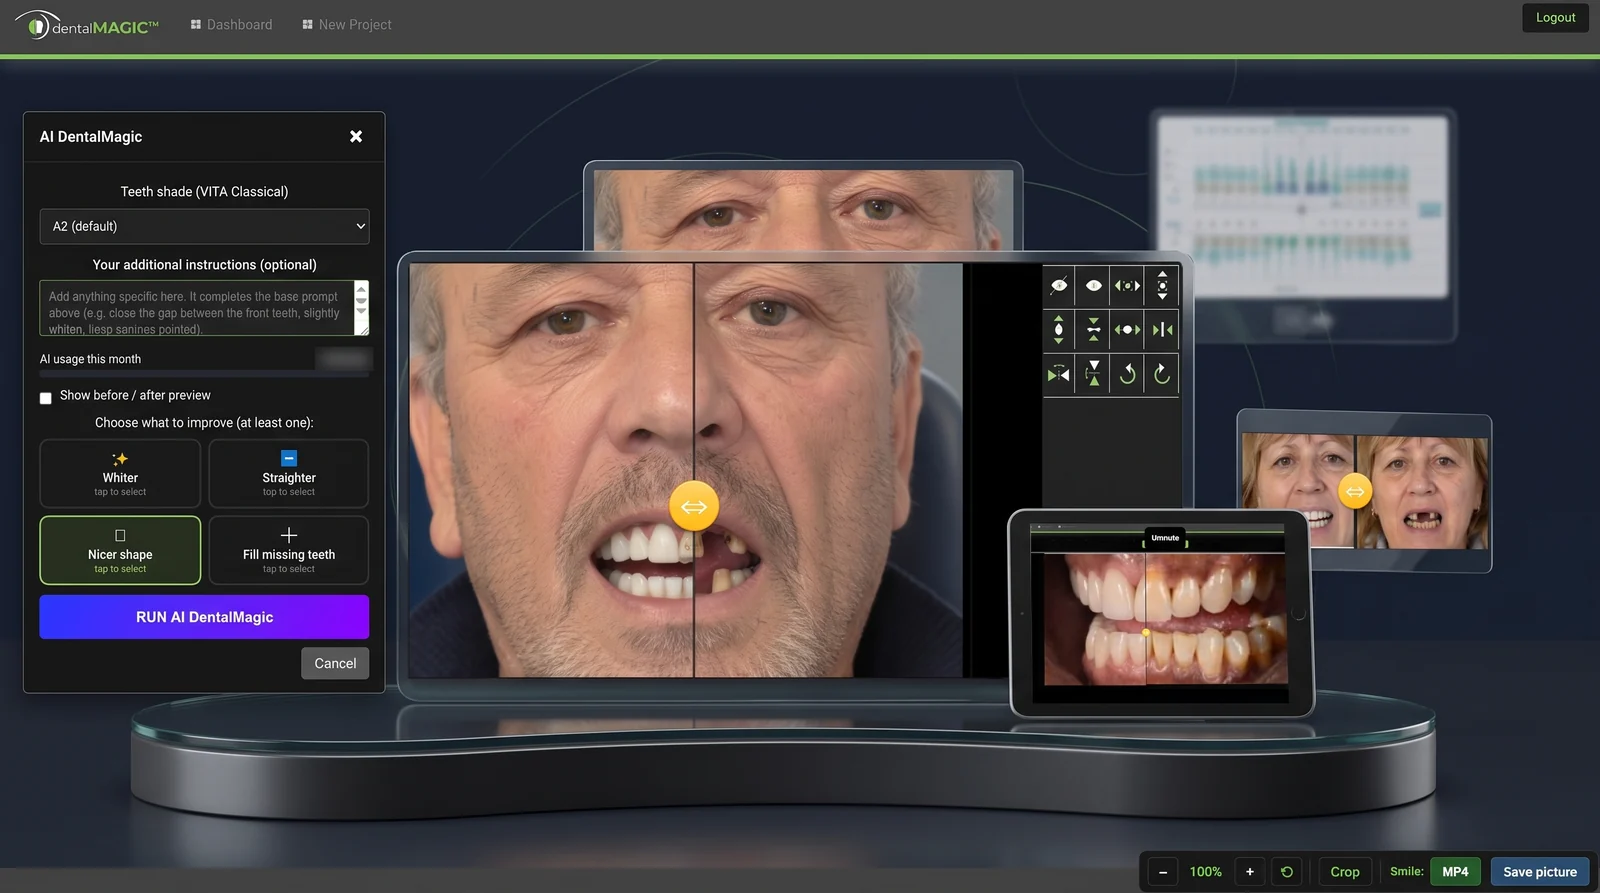
The transform pad, right of the workspace. Every control also has a keyboard shortcut.
The black dot decides which way the tooth grows.
The black dot is the fixed point — the layer grows away from it. Put it at the top and the tooth lengthens downwards, towards occlusion. Put it at the bottom and it moves up towards the neck and the gum. In the middle, it grows both ways at once.
It is also the centre of rotation. A badly placed dot sends the tooth off at an angle — that is almost always the explanation when a rotation doesn't land right.
Eleven tools. That is the whole interface.
The first six are for manual work. The purple button opens the AI. Below the image: zoom, cropping, MP4 export and saving.
Drag the handle in front of them.
The A|B button opens the comparison at any point. You drag the orange handle while the patient watches. Then export it — as an image for the patient file or an email, or as a short MP4 clip.
The AI window stays beside it: shade, instructions, the four improvements, and the counter showing what you have used this month.
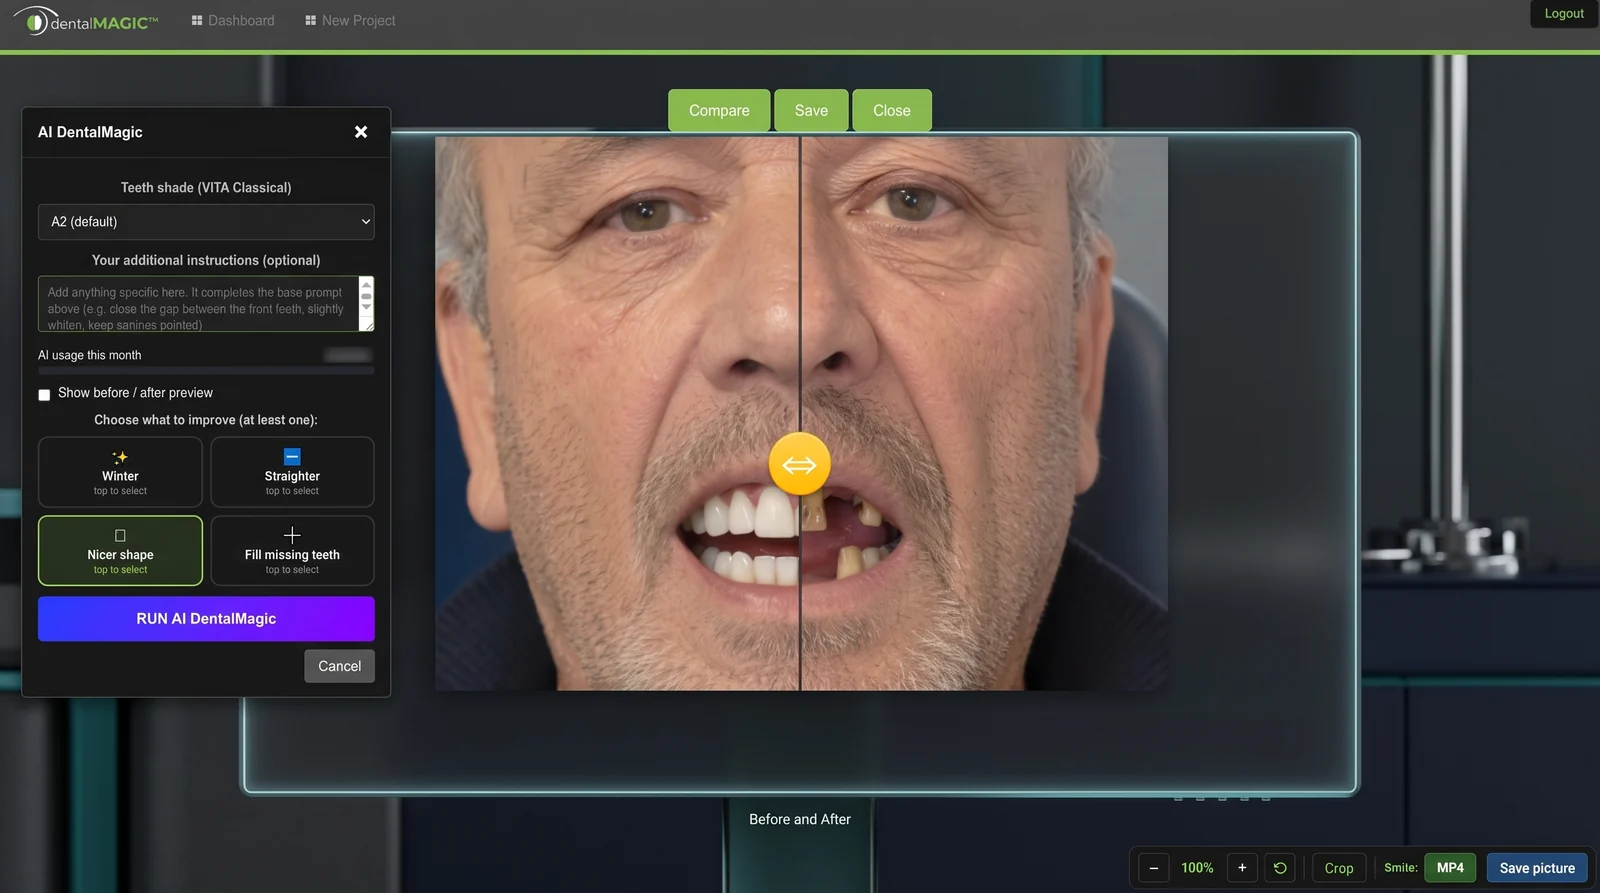
The AI window and the A|B comparison, in the product. The orange handle is what you drag in front of the patient.
One photograph, from import to comparison.
One for the chair. One for the website.
The same simulation serves two different moments: the consultation you are already having, and the enquiry you have not received yet.
In the operatory
Built for the consultation. You run the simulation in front of the patient, on the screen already in the room, and the conversation moves from what you would do to what they would look like.
On the clinic's website
Built for acquisition. A visitor submits a photograph on your own site and receives a simulation, then arrives having already pictured a possible result — a qualified aesthetic enquiry rather than an anonymous contact form.
Unlimited manual DSD simulations on both editions.
We do not keep them.
A smile simulation starts with a photograph of a face. That is personal data, and where it lives matters — to your patients, to your practice, and to whoever audits you.
Not stored on our side
Your patient photographs are not kept on our servers after the render. There is no library of faces to ask about.
Runs in the browser
No app store, no iOS requirement, no device to buy. It opens on the computer or tablet already in the room.
Consent stays yours
You hold the patient's consent for the import and the use of their image, as your regulator requires. The module does not stand between you and that duty.
A preview is judged on one thing: whether it holds up in front of the patient.
No simulation is a promise, and none should be presented as one. What it changes is the quality of the conversation that follows — the patient stops guessing, and starts asking the questions that actually precede a decision.
“The difference between a presented plan and an accepted one is clarity. This delivers it.”Dr Ronald E. Goldstein, DDS Key Opinion Leader · USA
“DentalMaster is la ‘crème de la crème’. Trust me!”Pr Bernard Touati Key Opinion Leader · France
It is a simulation, not a promise.
Images produced by DentalMagic are provided for demonstration purposes. They constitute neither a diagnosis, nor a treatment plan, nor any commitment as to outcome. Only the treating dentist is qualified to establish the diagnosis, determine the appropriate treatment and deliver the appropriate care.
The quality of the render depends on the sharpness, framing and lighting of the imported photograph, the complexity of the case, the patient's anatomy, the precision of the instructions entered, and the non-deterministic nature of artificial intelligence models. Two generations run from the same data may produce different results.
Every run — including a retry on the same case — counts as one use and is deducted from your credit, whether the result is kept or not.
Clinical & Regulatory Notice: DentalMaster applications are strictly informative and explanatory aids designed for practitioner-to-patient communication and visual education. They are not certified medical diagnostic devices. The certified dental practitioner remains solely responsible for clinical diagnosis, treatment evaluation, and final therapeutic proposals.
Published, and the same for everyone.
One accepted aesthetic case covers the year.
- Both routes: AI and manual
- All four improvements
- A|B comparison and image export
- 50 AI images per month — 600 a year
- Unlimited manual DSD work
- VITA Classical shade selection
- MP4 before / after clip export
- Save and reopen projects
- One licence is one practitioner
- For a practice that runs a few cases a month
- Adds to the licence if you go over
- Manual work is never metered
Prices exclude VAT. There is no free trial: the five images are a permanent free tier, not a countdown.
First the case, then the smile.
Some cases start as an aesthetic conversation and turn out to be implantology, prosthetics or a full rehabilitation. That is a different tool and a different conversation: DentPlan3D rebuilds the patient's own case in 3D, and the aesthetic layer comes after it, never instead of it.
Before you ask.
Is this a treatment plan?
No. A DentalMagic render is an illustration intended to support the conversation with the patient. It does not take account of what is under the gum, how the bite closes, or what the enamel will take. Only a certified practitioner can examine the mouth, establish a diagnosis and set out what is realistically achievable.
Can I change the shape of a specific tooth?
Yes — that is the manual route. You lasso the tooth, create a layer, and resize, rotate or duplicate it with the transform pad or the keyboard. This is the part an automated-only simulator does not give you.
What do I need to install?
Nothing. DentalMagic is a cloud module and runs in the browser on the computer or tablet you already have. There is no app store requirement and no particular operating system.
What happens to the patient photographs I upload?
They are not stored on our side after the render. You are responsible for holding the patient's consent for the import and use of their image, and for complying with the health-data regulations that apply to your practice.
What counts as one AI image?
Every run counts as one use, including a retry on the same case, whether you keep the result or not. Manual work is not metered. If you run out, a 25-image pack is €49, or the annual licence brings the year to under one euro an image.
Is there a free trial?
No. The five free images are a permanent free tier, not a trial that expires. You use them when you want to, and the licence is there when the volume justifies it.
Run one on a case you already have.
Take a photograph from a case on your desk, tick an improvement, and look at the A|B slider. Two minutes will tell you more than this page can.